New Order
Order creation through the Client Center is disabled by default. You need to enable the respective global JSON settings first.
Once that's done, users with external role L20 - Orders and above will get access to the New Order module.
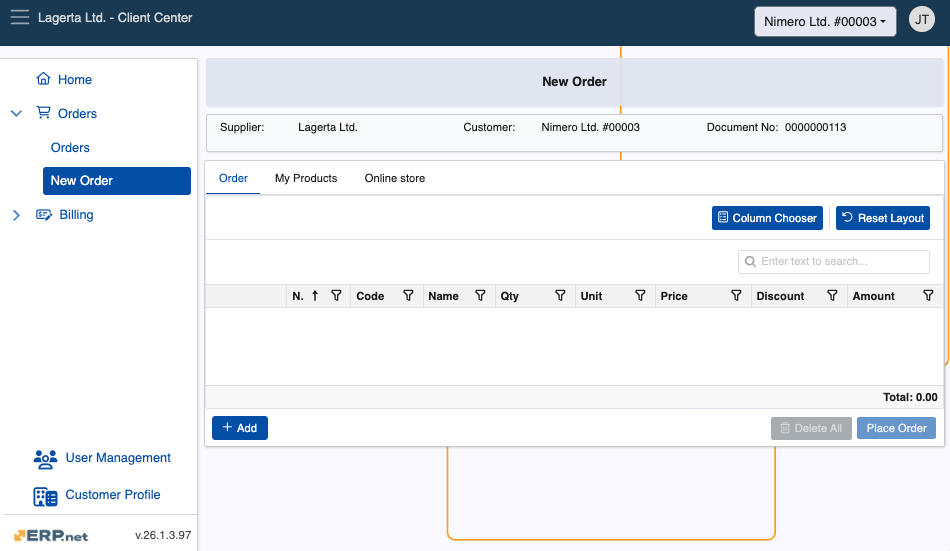
This is a multi-tab interface designed to handle the filling out and placement of new sales orders.
Structure
As soon as you access the module, you can find which is the Supplier, Customer and Document No for that order.
New Order consists of one primary tab - Order, but it can be configured to include more:
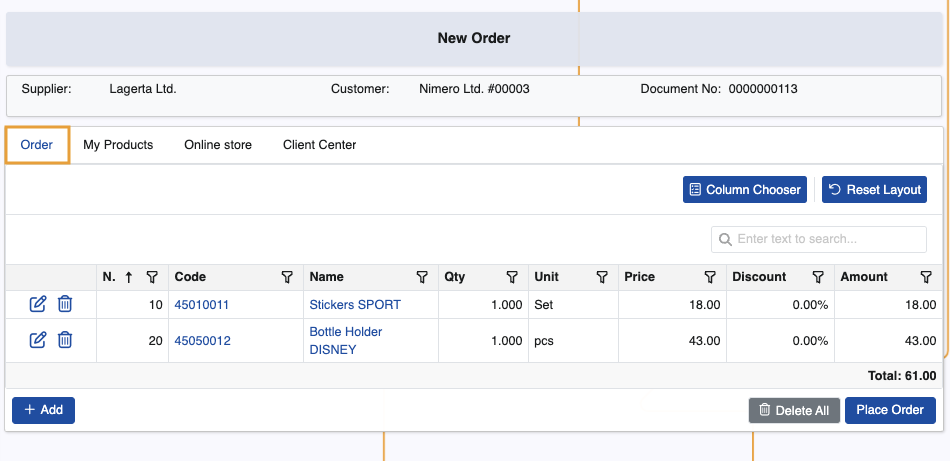
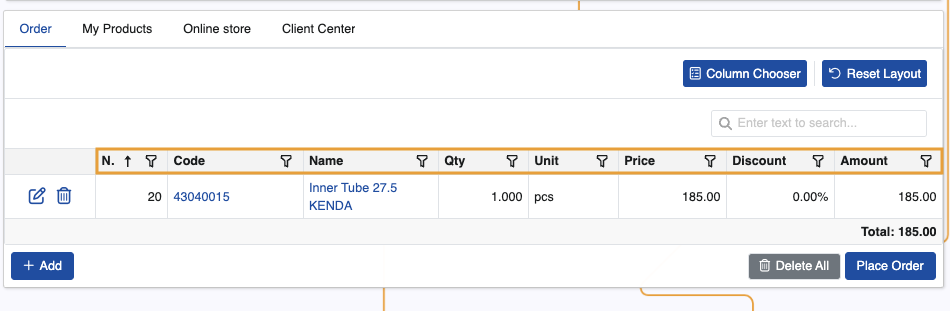
Order - This is where the order is built. You can add products manually by entering their code and quantity.
Product quantities specified in other tabs will automatically appear here.
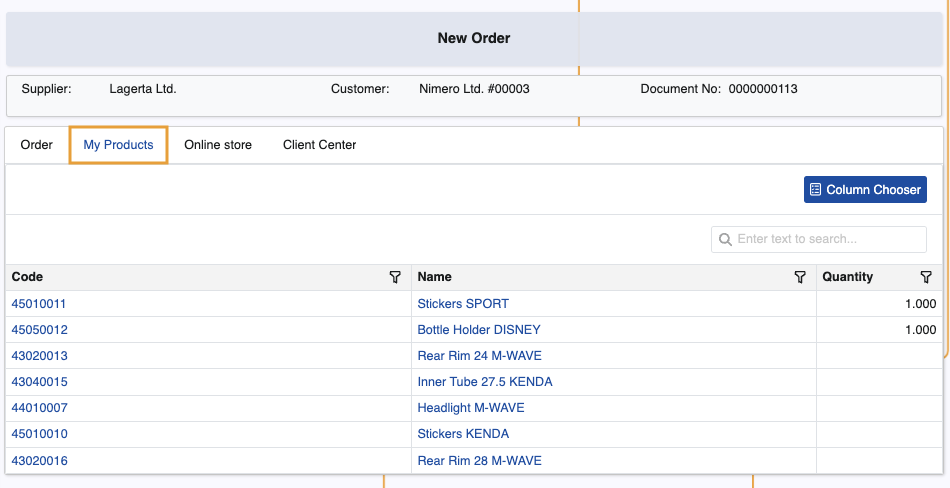
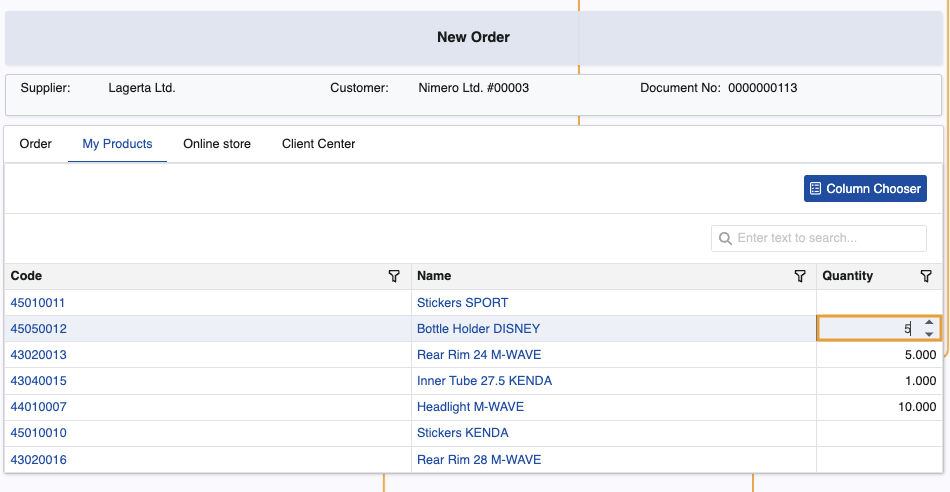
My Products - All available customer products are stored here. This tab can be hidden or enabled with an appropriate JSON setting.
You can add customer products to the order simply by specifying their quantities in the Quantity field. Once a quantity is set, the respective product will appear in the Order tab.
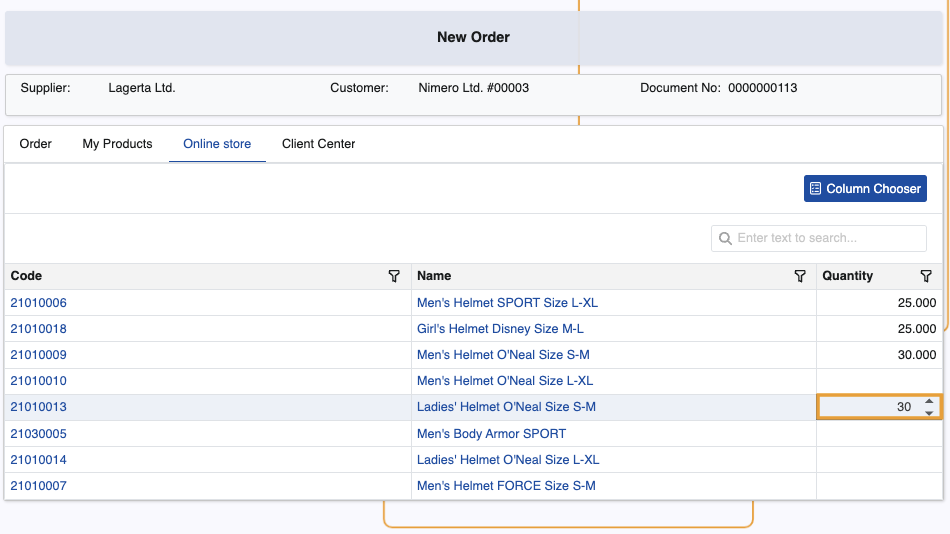
A tab listing products linked to the customer's default distribution channel - It can be optionally revealed with a JSON setting and always carries the name of that channel.
You can specify product quantities in the Quantity field to add them to the order. Once a quantity is set, the respective product will appear in the Order tab.

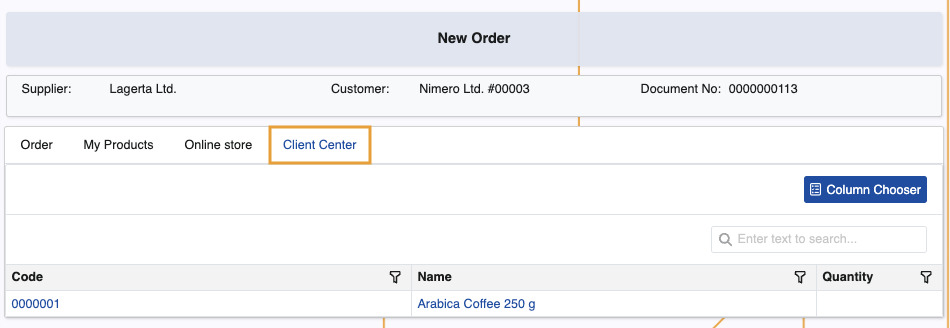
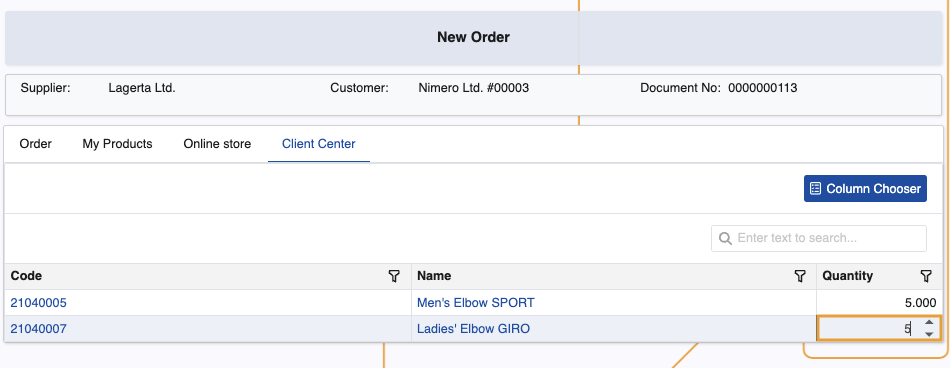
A tab listing products linked to the Client Center's distribution channel - It can be optionally enabled with a JSON setting and always carries the name of that channel.
Like in all other tabs, you can specify product quantities in the Quantity field to add them to the order.
Promotional packages - This tab shows the promotional packages available for the current customer and order context. For details on how to use it, see Promotional packages.
Product info
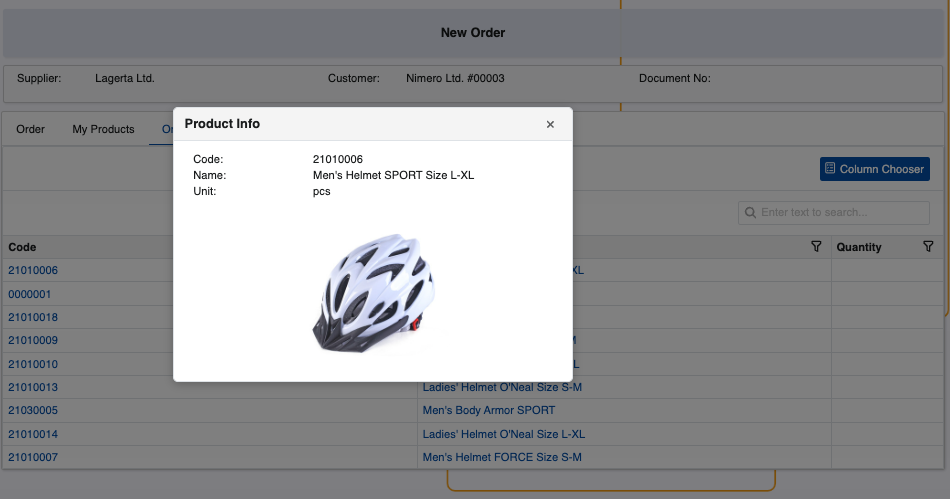
You can see details about a product if you click on either its code or name.
This will trigger the Product Info pop-up which contains more information, including a product picture, if available.
Clicking the picture once will expand it further, hiding the remaining details.
Notes
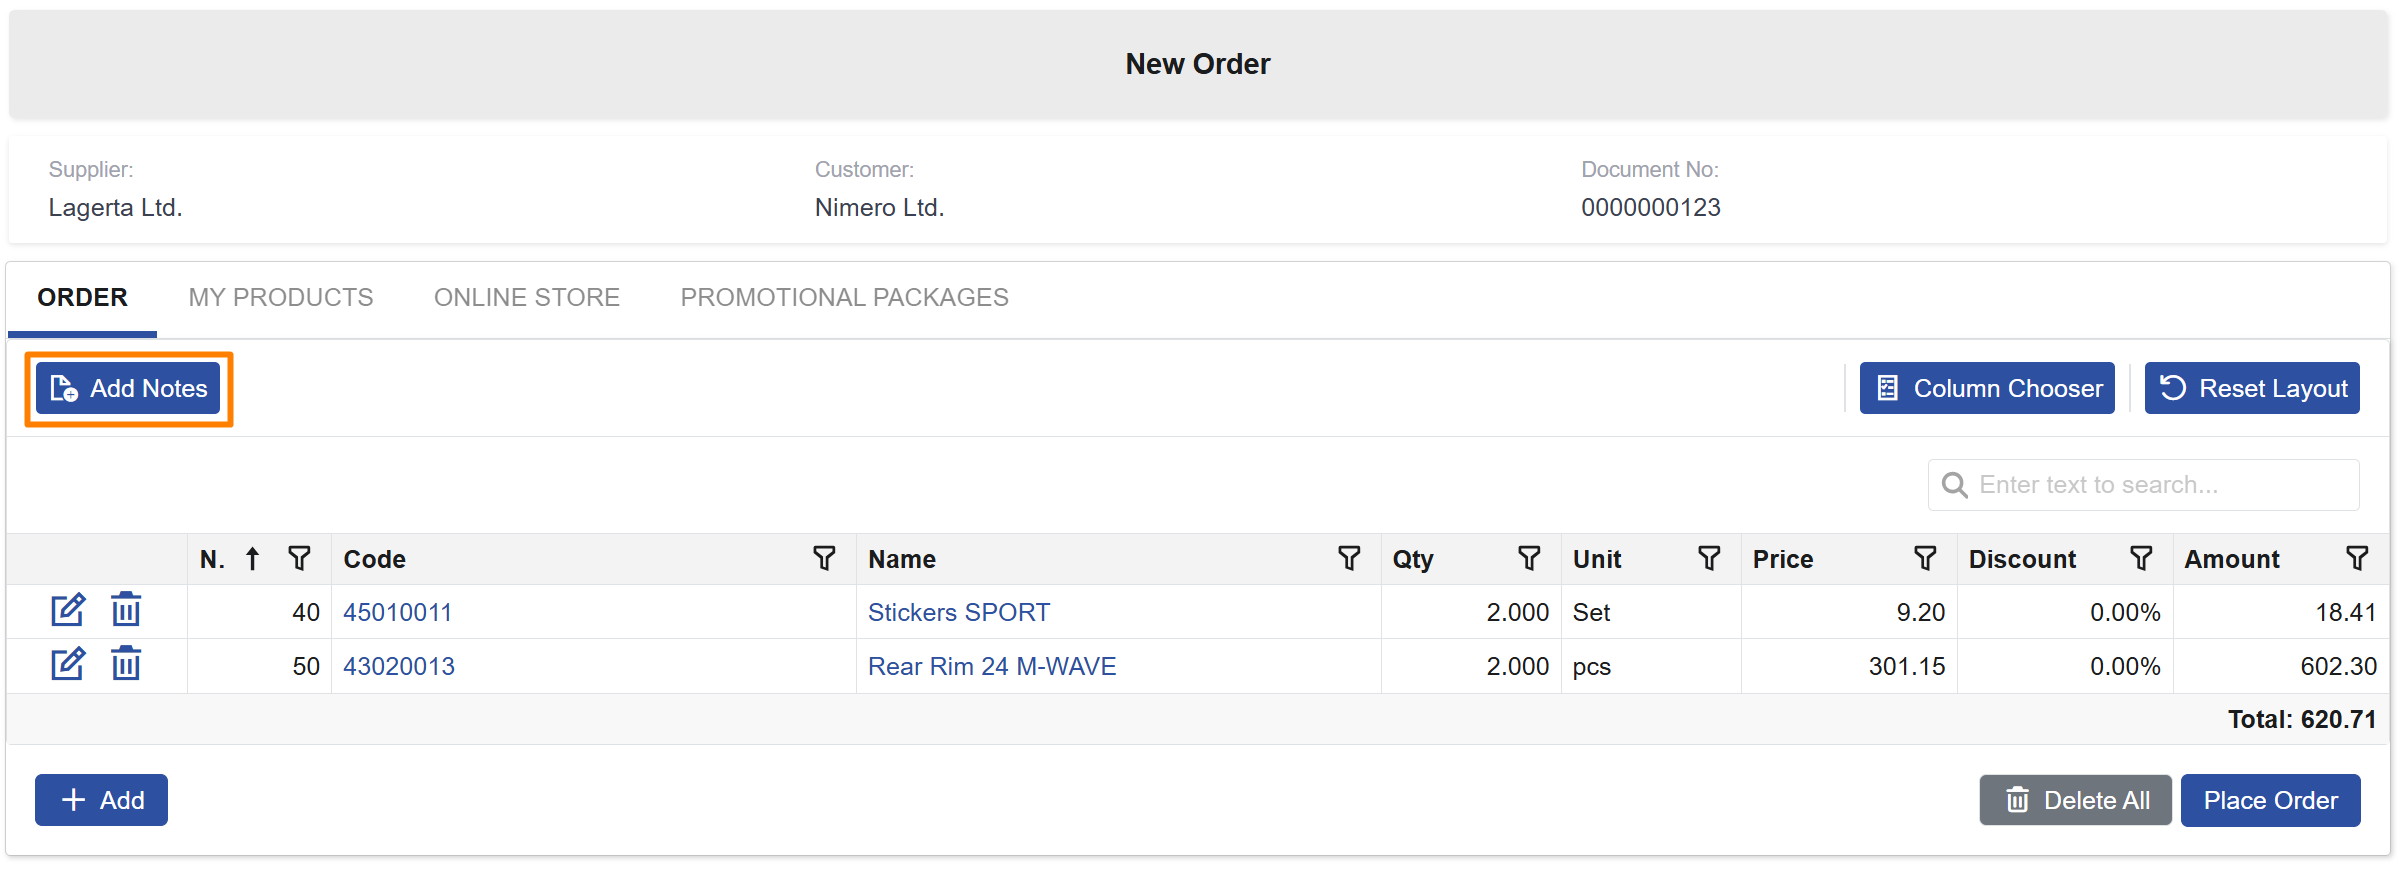
To add additional instructions (e.g. delivery details or preferences) while creating the order, use the Add Notes action in the command bar of the Order tab.
- When no note is saved yet, the button is labeled Add Notes.
- After a note is saved, the button is labeled Notes.
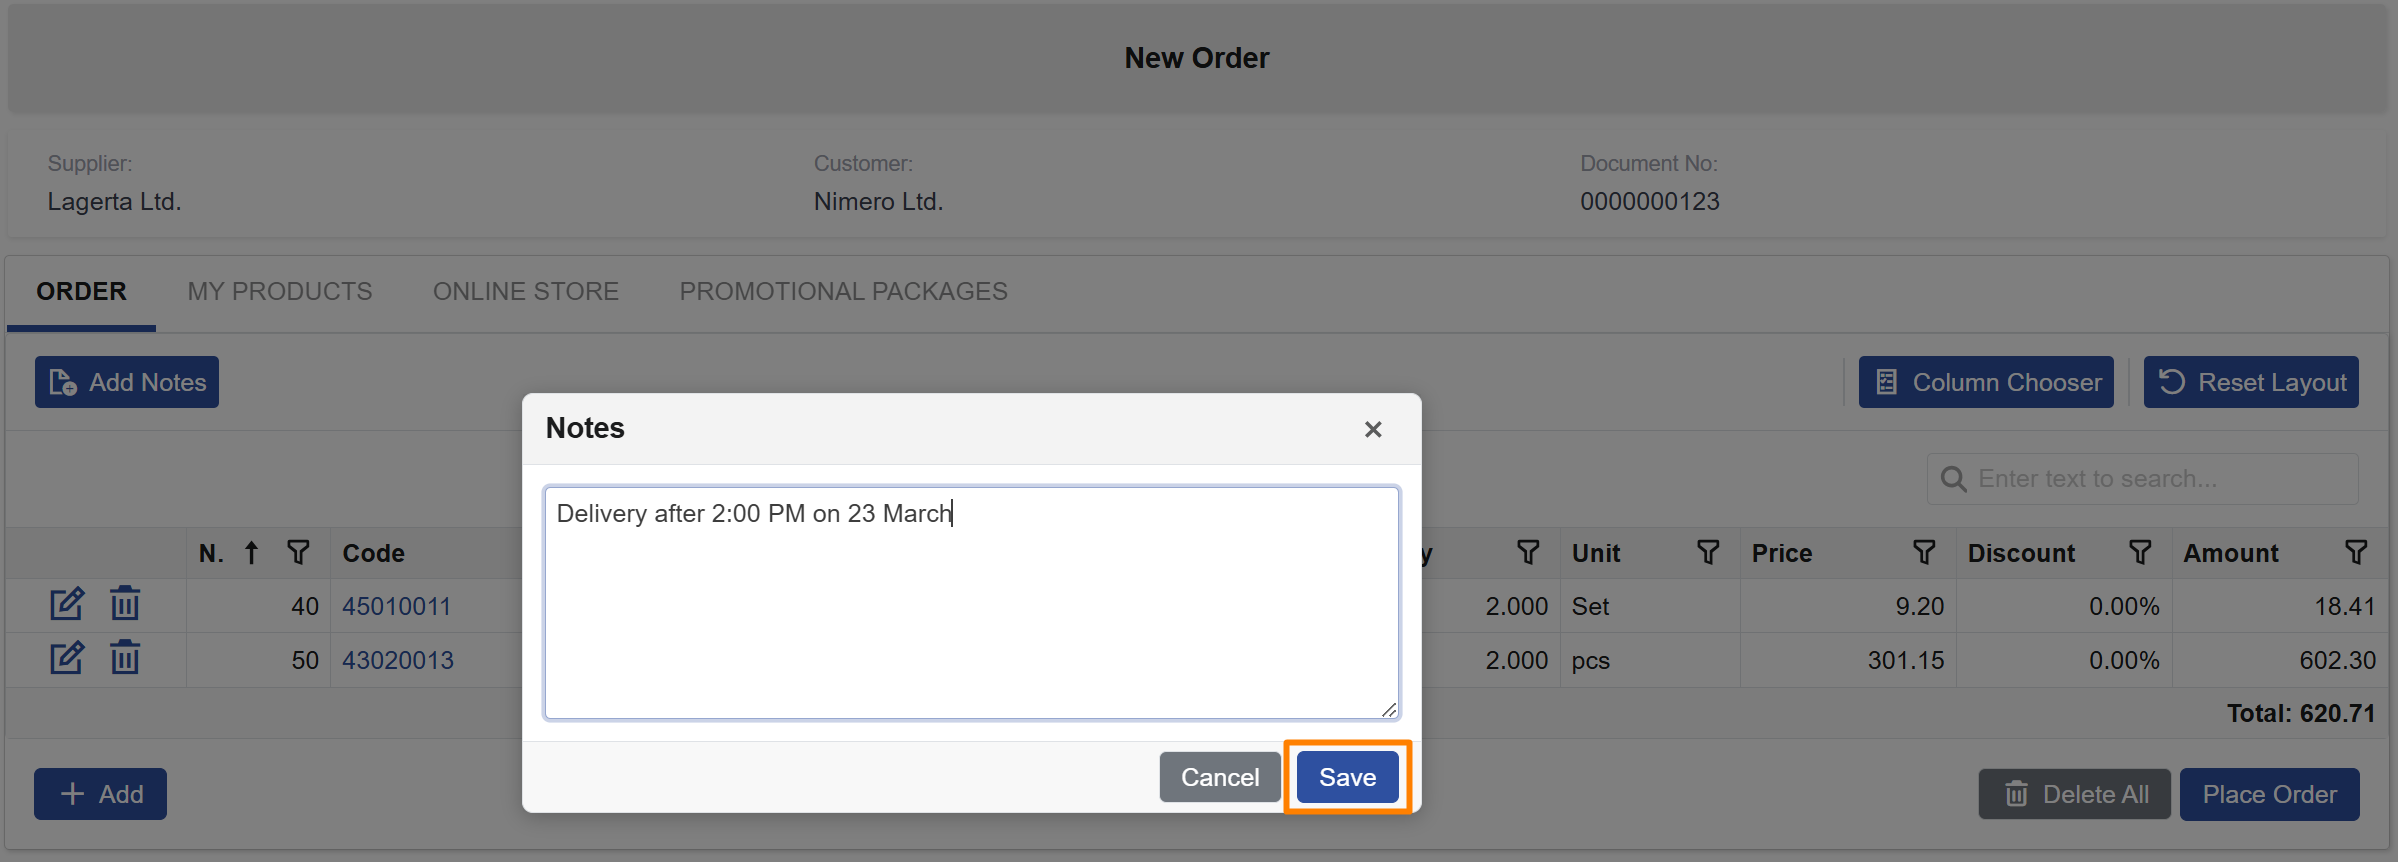
Clicking the button opens a popup where you can enter or edit the note. Use Save to store it or Cancel to close without changes.
Notes are optional and do not block order creation when left empty.
Notes are stored in General.Documents.Documents.DocumentNotes.
Create a new order
To begin, add products to the order. There are several ways to do this:
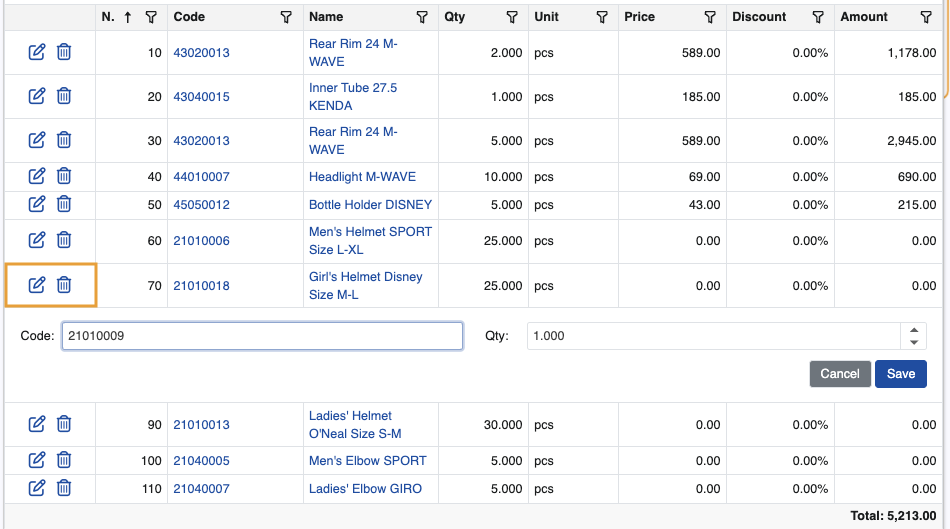
From the Order tab, click the Add button. This will reveal the Code and Qty fields, where you can respectively provide the code of the product and how many instances of it you need ordered.
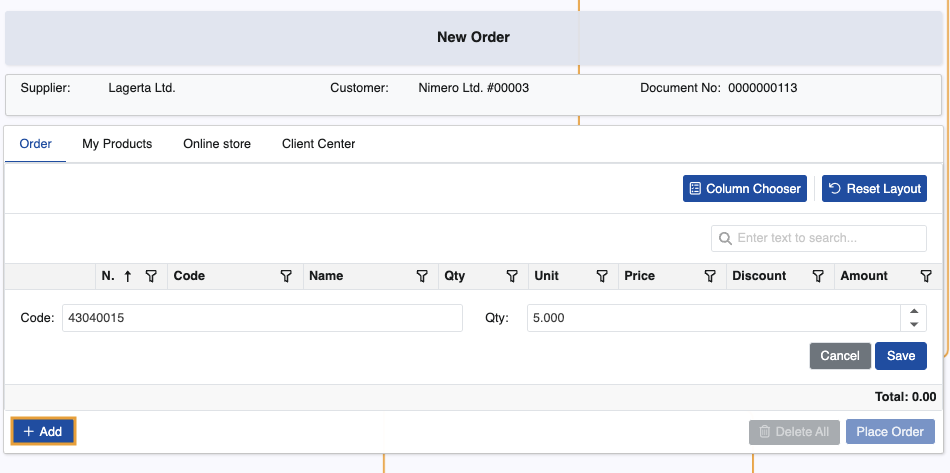
When you click Save, the product will be added with all the respective information about it, like Unit, Price, and Discount.
Note that the value of the Discount column is associated with LineStandardDiscountPercent.
From the My Products tab, click on the Quantity field of a customer product row and specify the exact quantity you need ordered.
This will automatically add it in the Order tab with the respective information.
Depending on how the Client Center is configured, users may add products linked to their customer's default distribution channel.
The process to add them is identical to the My Products tab.
If the Client Center's distribution channel has products linked to it, they will be available for selection as well.
Promotional packages
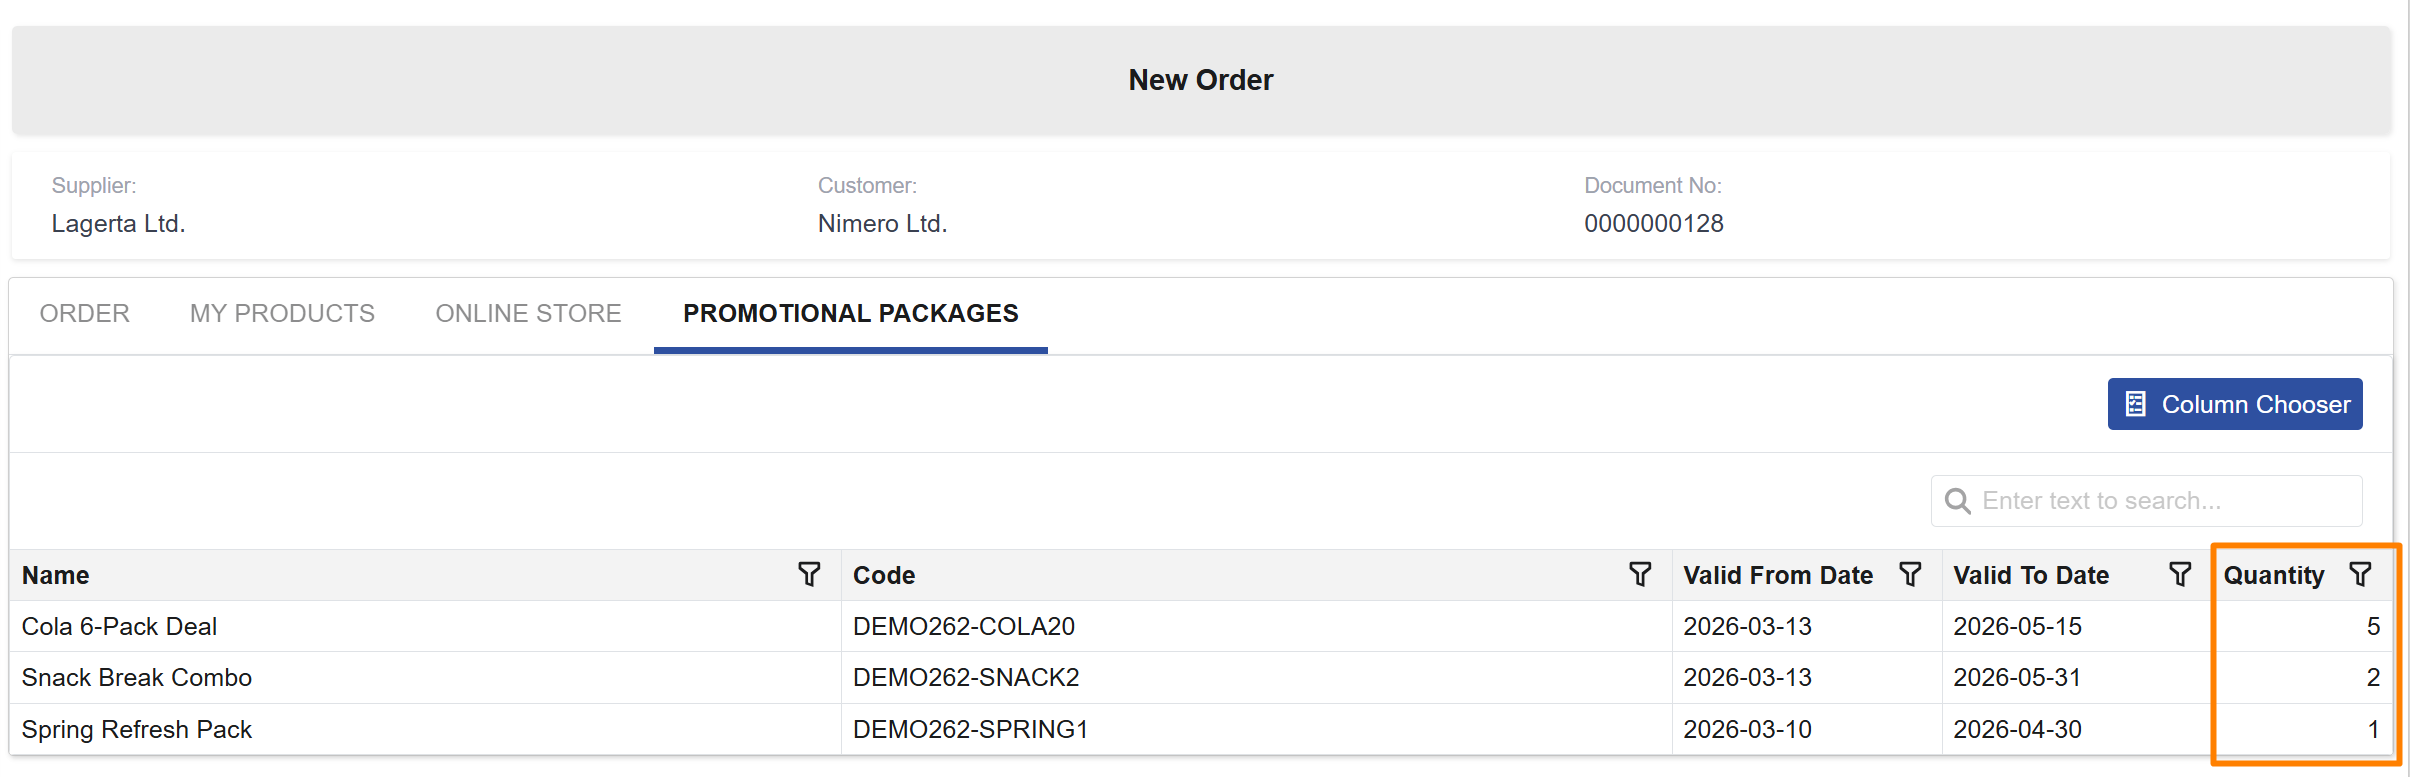
The Promotional packages panel in New Order shows the promotional packages available for the current customer and order context.
Only packages that are active, valid for the current date, and applicable to the current order conditions are displayed.
The panel shows the following fields:
- Name
- Code
- Valid from
- Valid to
- Qty
To add a promotional package, enter a quantity in the Qty field and use Add prom. pack. The system then automatically adds the corresponding package lines to the Order according to the package definition and pricing conditions.
Lines added from a promotional package are visually distinguished and cannot be edited manually.
The Order panel also includes a Promotional package field, which shows which package each added line originates from.

Default store and product availability
All sales orders in the Client Center can have a store automatically set for them after they are created. Administrators can define it with the respective JSON setting. If not defined, the Store field will remain empty.
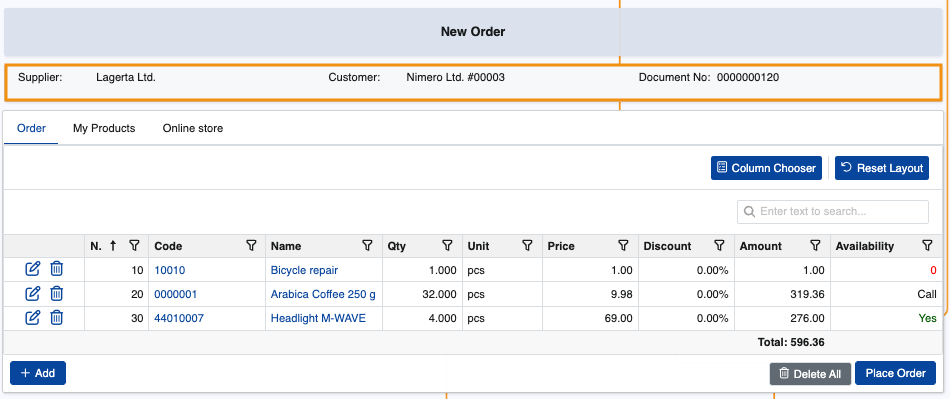
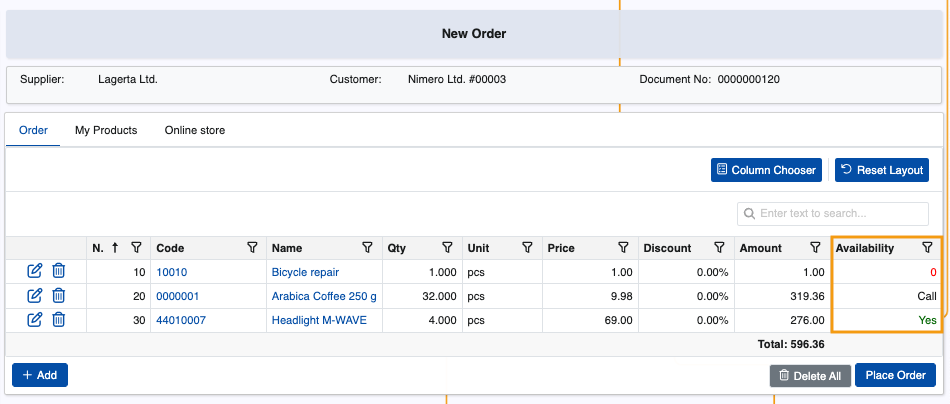
Provided a store is specified and a maximum availability threshold is in place, you will be able to see the availability of all products you wish to include in the order.
The Availability column can be optionally revealed through the Column Chooser, and it can have one of the following values:
If the specified quantity of the product is less than or equal to the available quantity, a green "Yes" label will be shown (e.g. 12pcs are requested, but there are 15 in total)
If the specified quantity of the product is more than what is available, the actual available quantity will be shown in red (e.g. 2pcs are requested, but only 1 is present in reality)
If the specified quantity of the product is more than what is possible to be revealed in the Availability column (as per the AvailabilityMax setting), a "Call" message will be shown, indicating the need to contact a sales representative to confirm if the requested quantity is actually available.
This is necessary regardless of whether the real availabilty is smaller or larger than the one requested.
Modify or delete quantities
When you're done adding the quantities of the desired products, you can always edit or delete some of them if needed.
The New Order module also provides the added benefit of automatically saving the latest state of the order.
This means that if you switch to a different page or choose to place your order later, it will always be automatically saved and registered with status "New".
Confirm and place
To conclude the order, click Place Order. You'll be asked to confirm if all details have been reviewed.
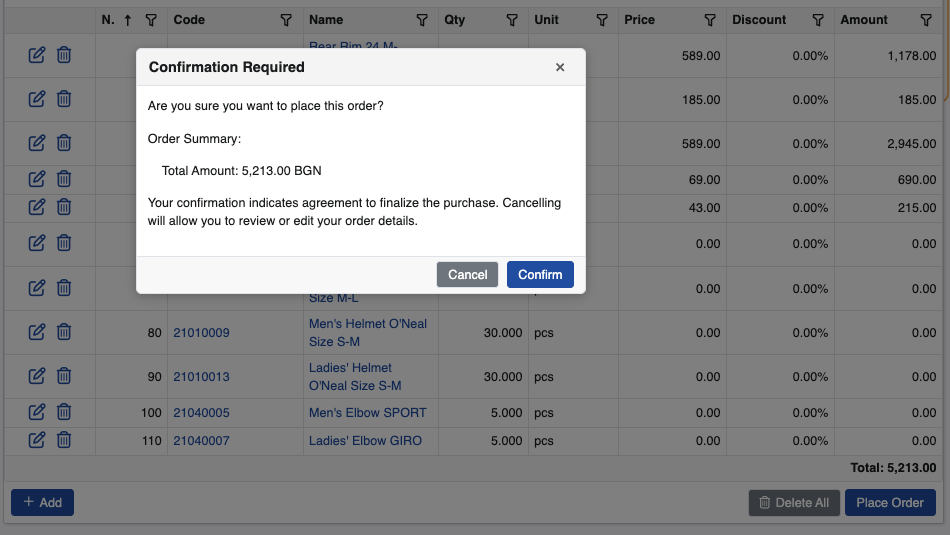
When the user confirms Place Order, the order date is automatically updated to the current date.
If the order is reopened later but not submitted, the date is not changed until the order is placed.
If all order lines are removed and the order is not submitted, the order remains in New state and its date is not updated.
Newly created orders are stored on the Orders page.
Note
The screenshots taken for this article are from v.26 of the platform.