How to invite a user to a WEB instance
To create an account for a new user, an email invitation must be sent to this user from an administrator.
The process involves two participants – the administrator of the instance and the new user.
Administrator's steps
An administrator must create a new user in the instance:
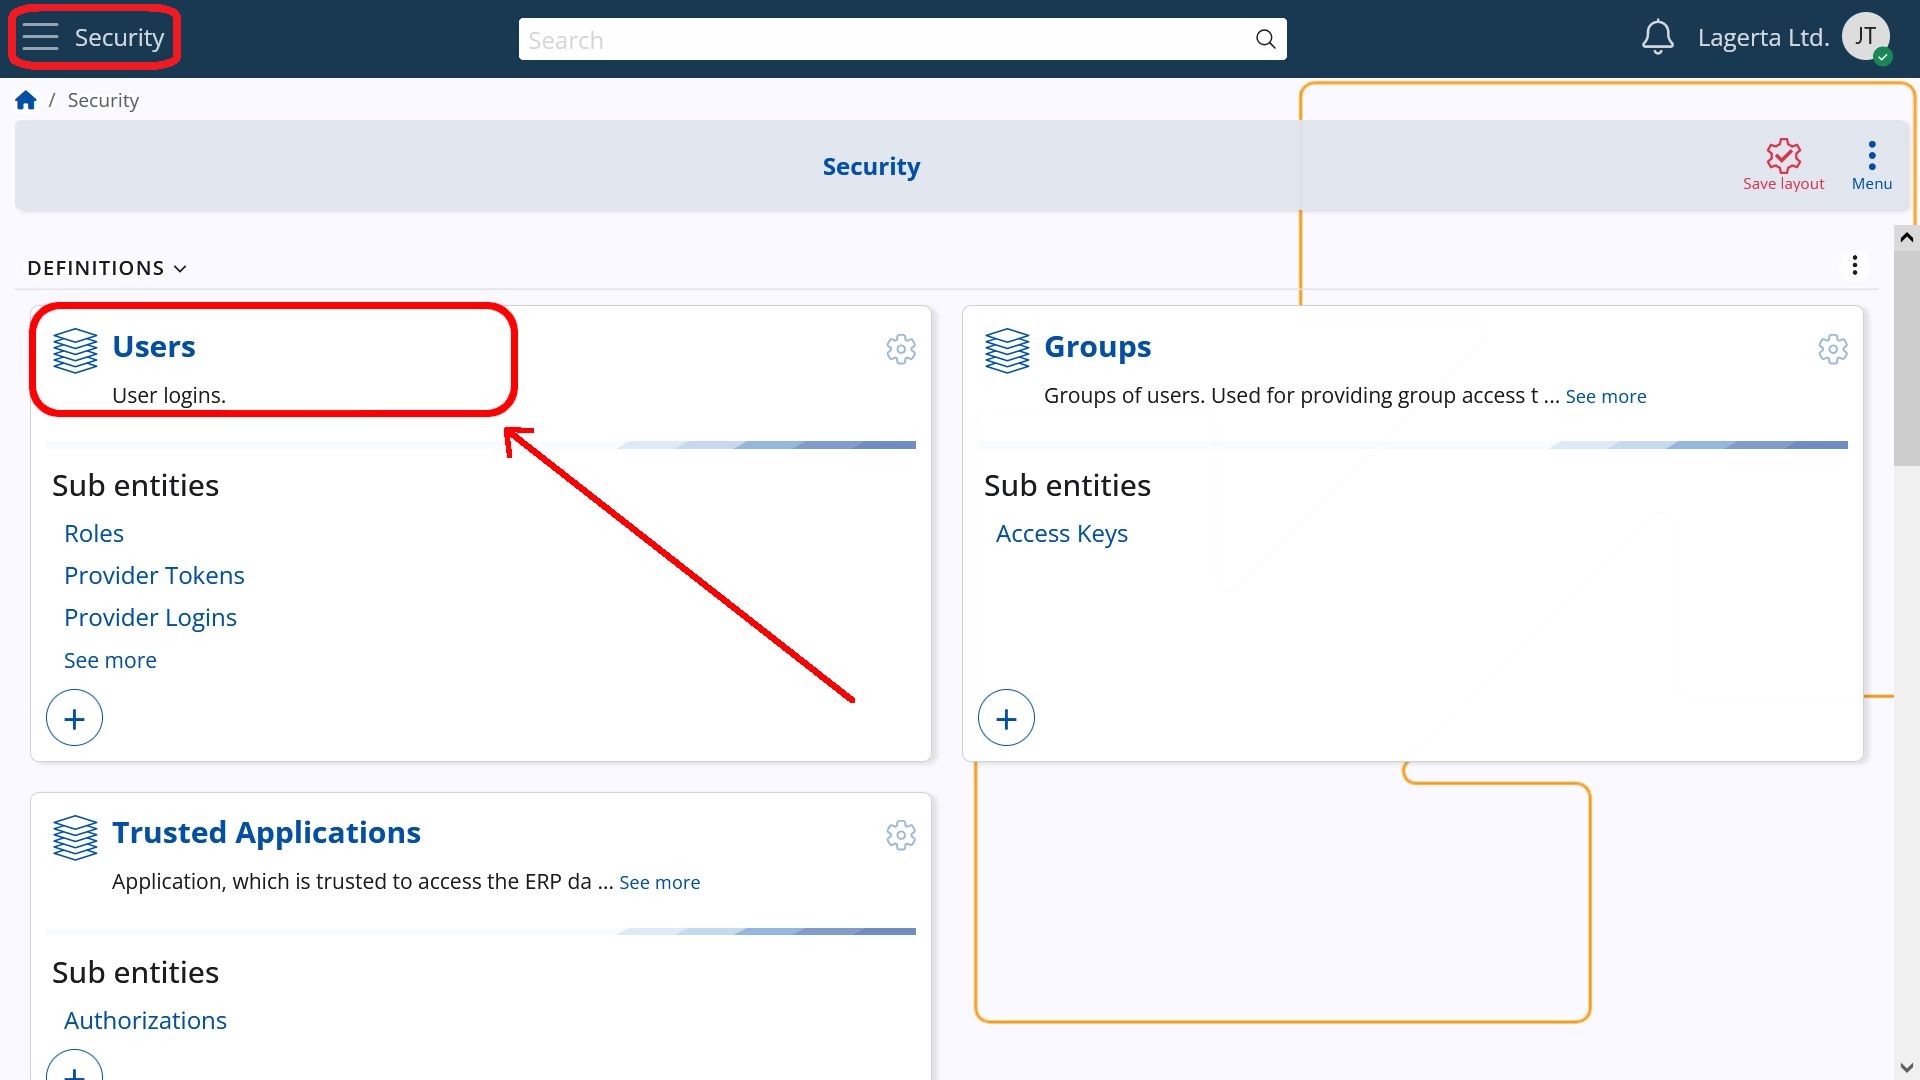
1. Go to the Security module and open navigator "Users".
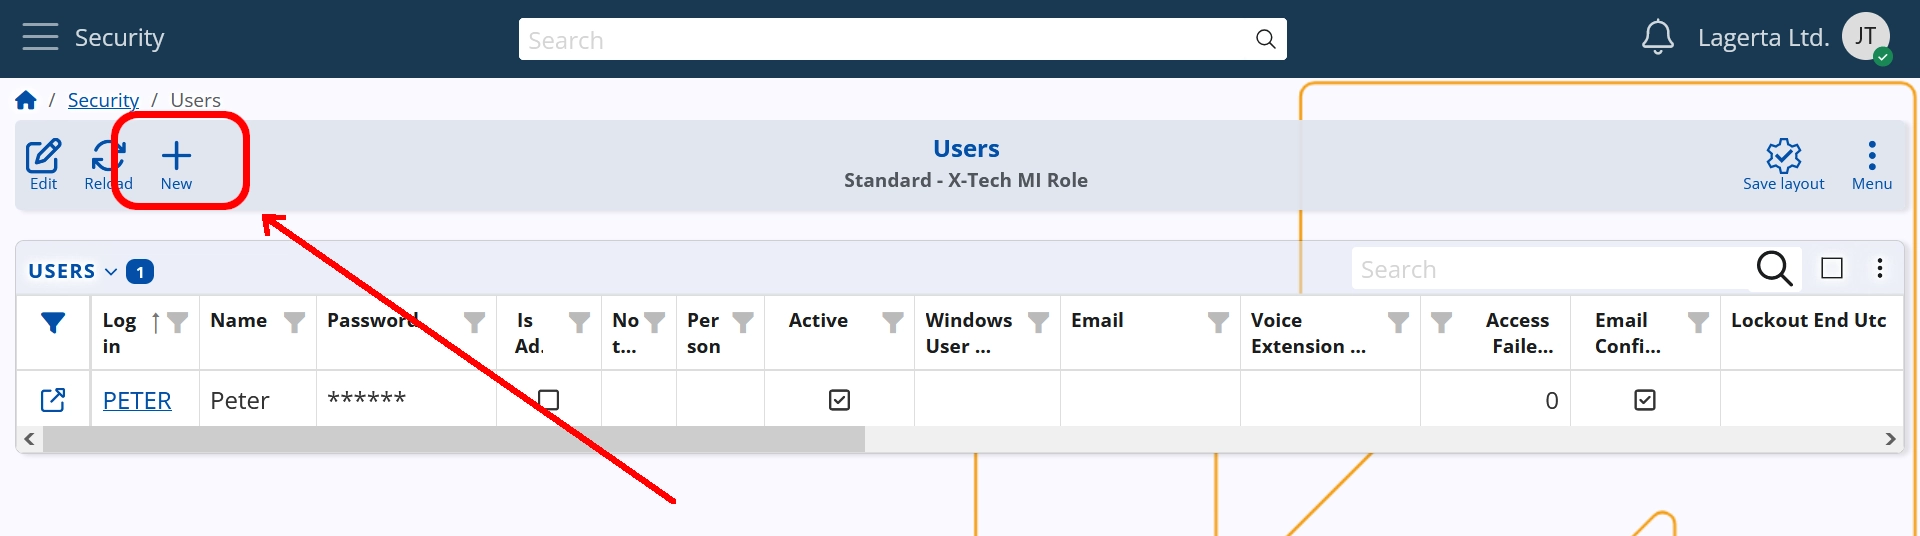
2. On the header line (the horizontal grey line), find the “plus” button and click on it.
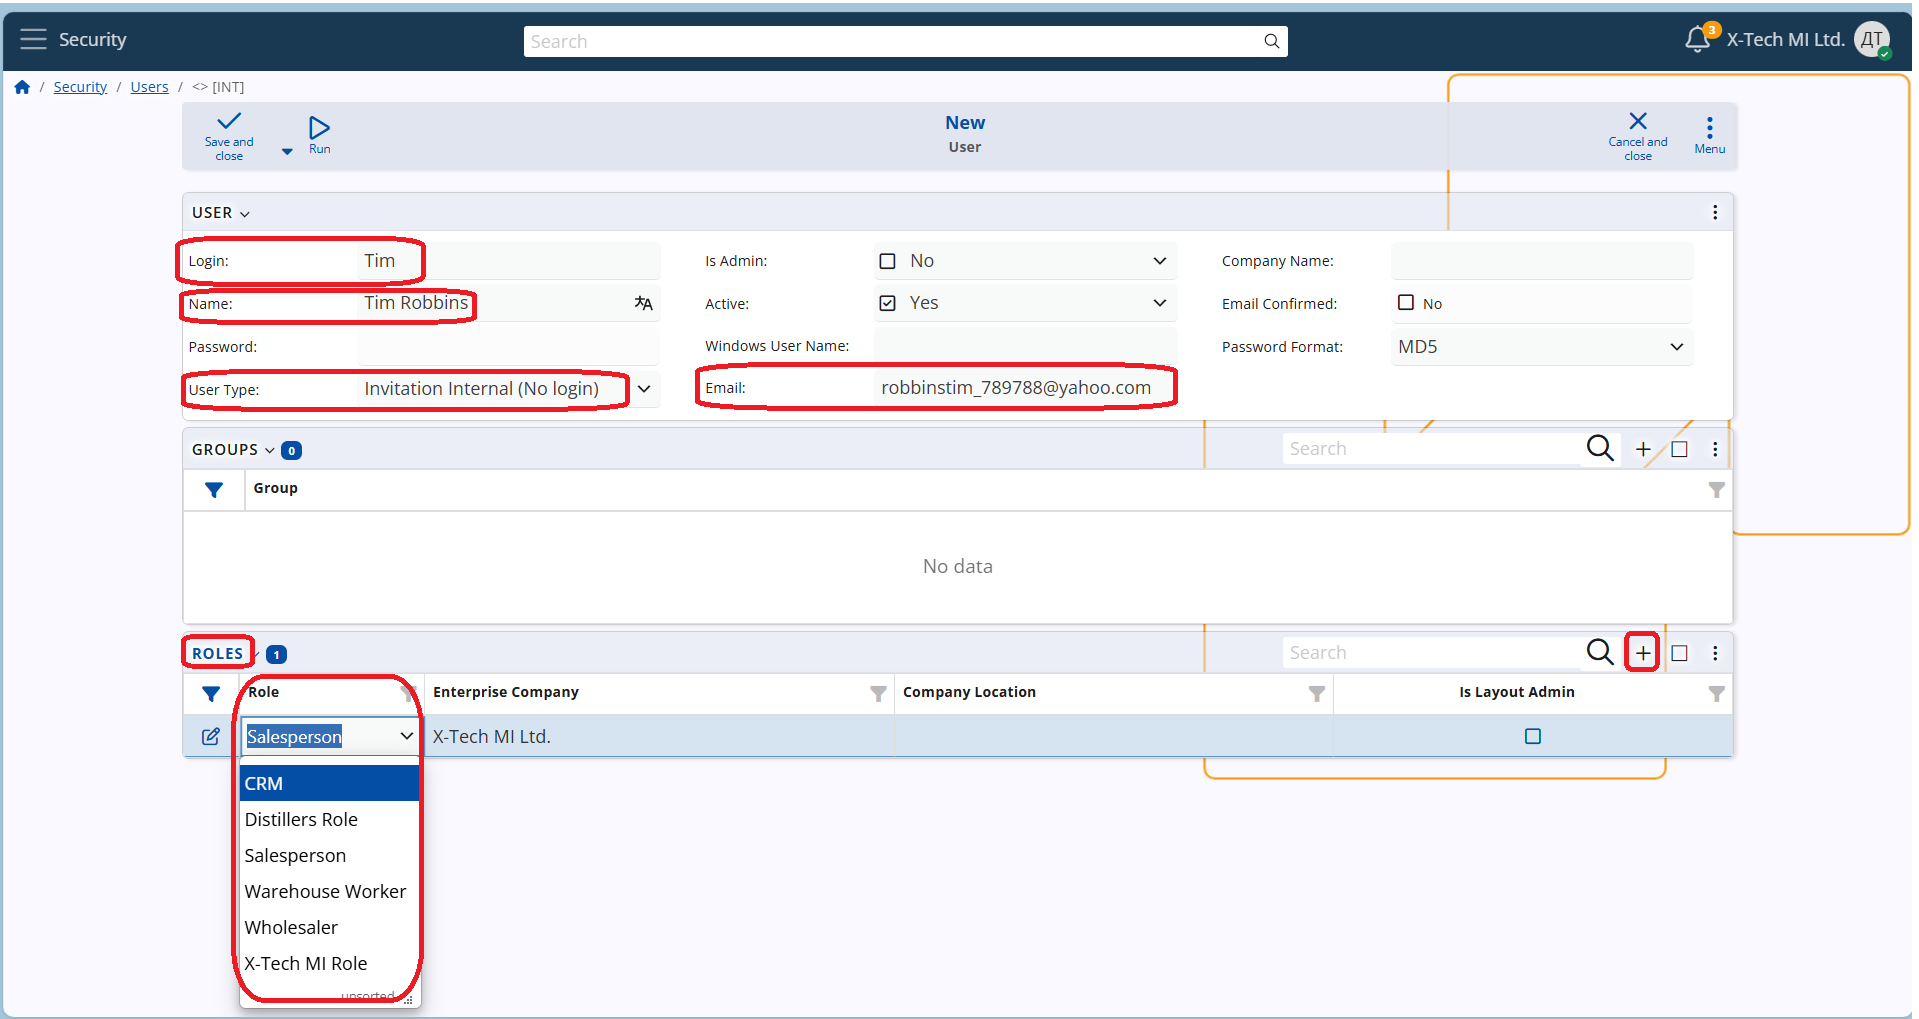
This will open a form that you should fill in.
3. Fill in several required fields:
- Login – the login name of the user
- Name – the name of the user
- Email – a valid email address, to receive the invitation
- User Type – this is a very important field at this point.
Clicking on it will open a dropdown menu. You must choose:Invitation Internal (No login)
4. Assign a role for the new user – you can do it now or at a later stage.
This is done in the "Roles" panel.
Find the “plus” icon on the right side and add a new line in the panel.
In column "Role", choose an available role (e.g. Salesperson, Manager, Worker, etc.).
You can assign several roles per user.
5. Save the new user by clicking the arrow next to "Save" using option "Save and reload"
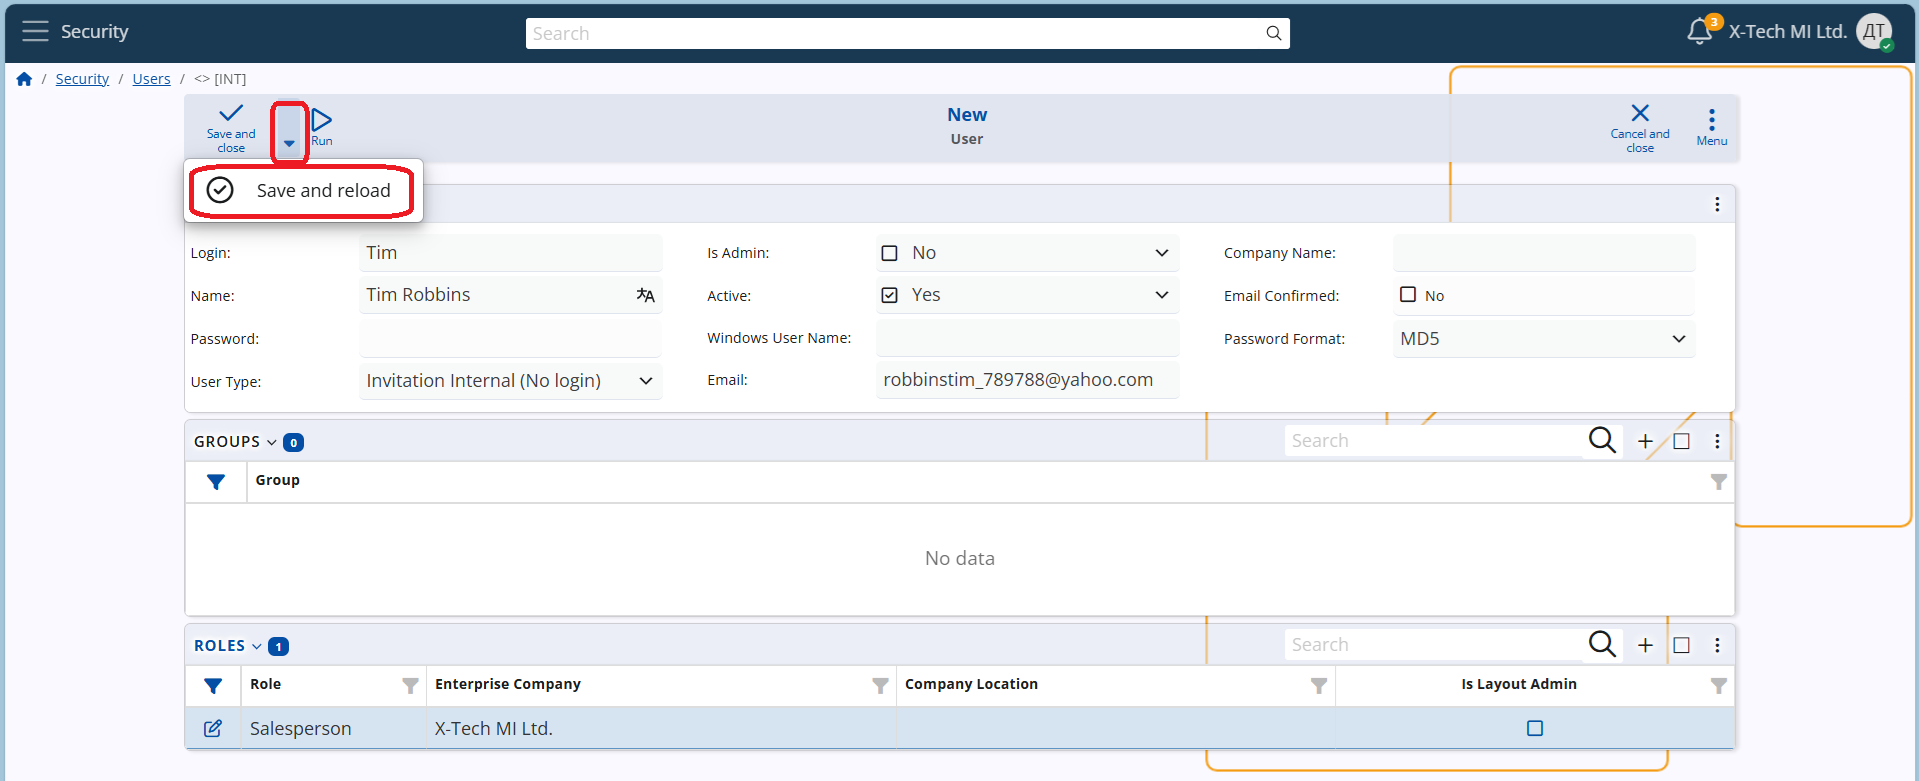
At this stage, a new user is created and saved in the platform. He is assigned to the group "Everybody".
It is time to send the invitation.
6. On the header line, click “Run”.
7. Choose option: "Send invitation mail"
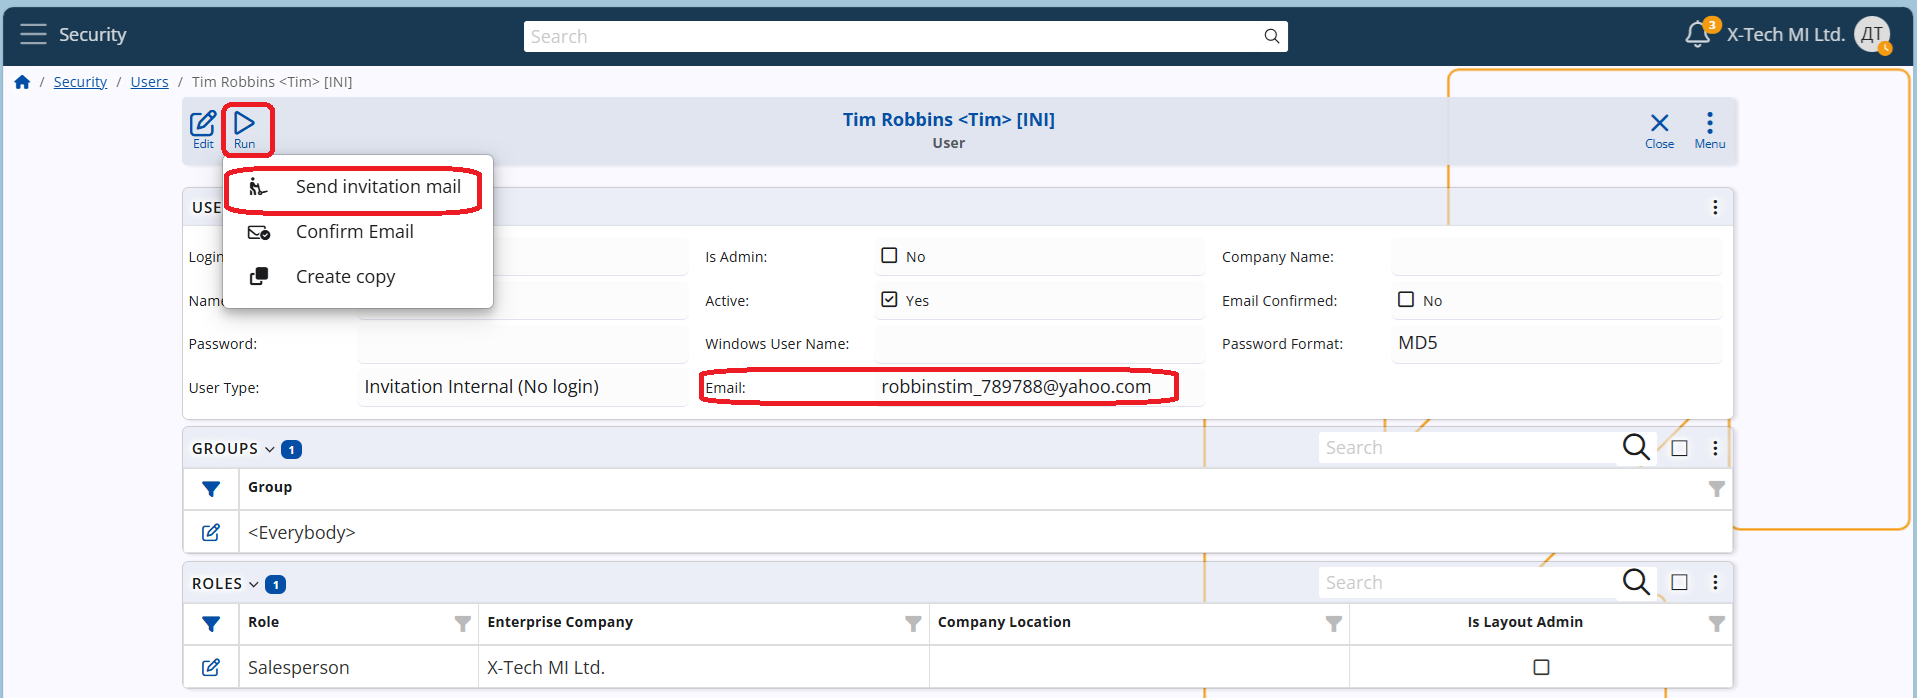
The system will ask for confirmation. Confirm by clicking OK. This sends an email to the user. The e-mail letter contains a link, leading to the registration form of the instance, where the new user should put his passowrd.
User's steps
8. The user will receive an email from: notification@erpnet.info, Subject: Invitation to join {InstanceName.my.erp.net}
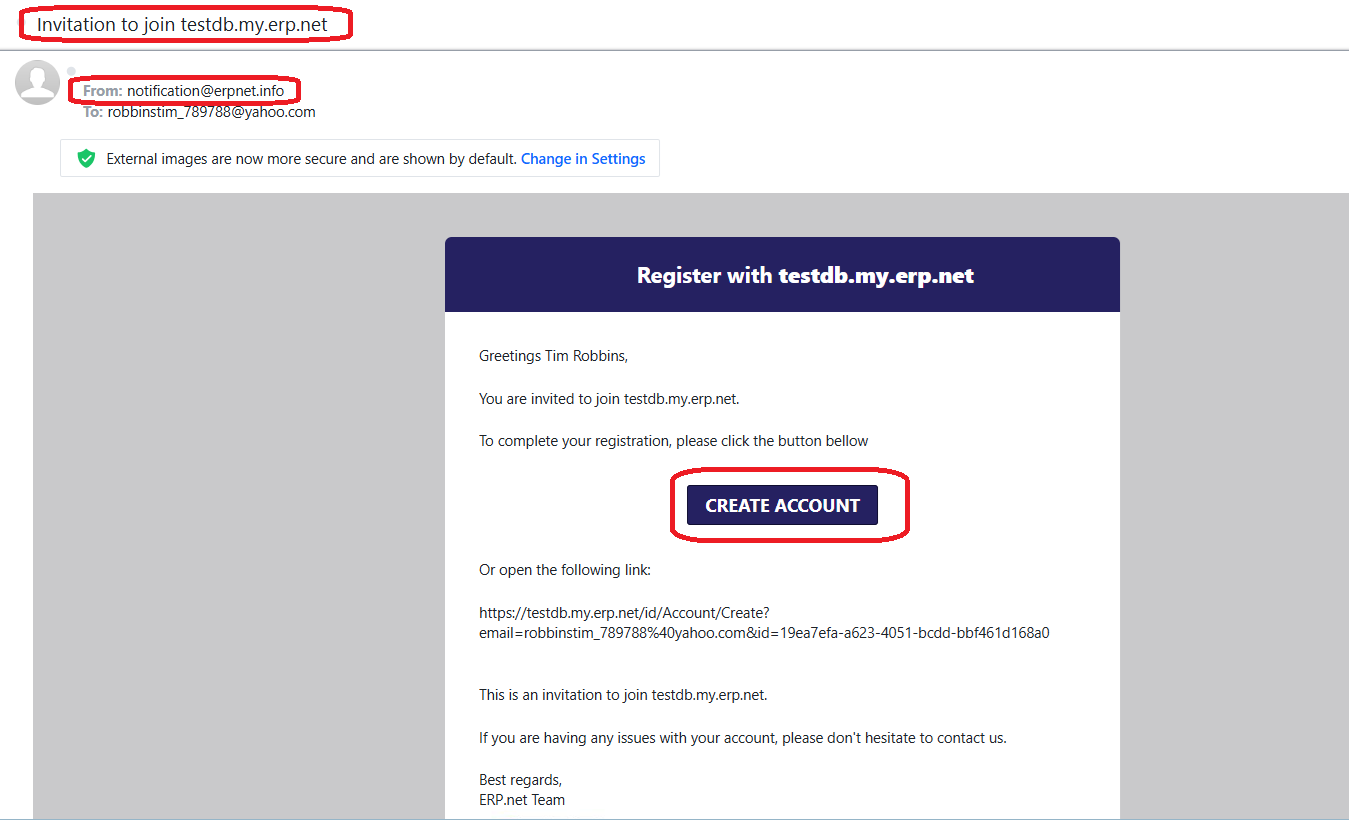
9. The user must click the Create Account link and will be transferred to a form:
- email is elready filled and confirmed.
- еnter user's name.
- цreate an 8-character password and confirm.
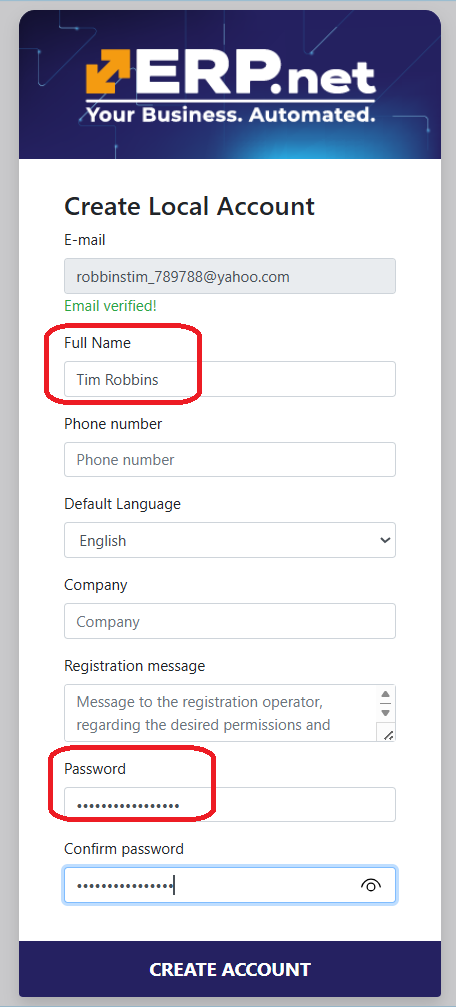
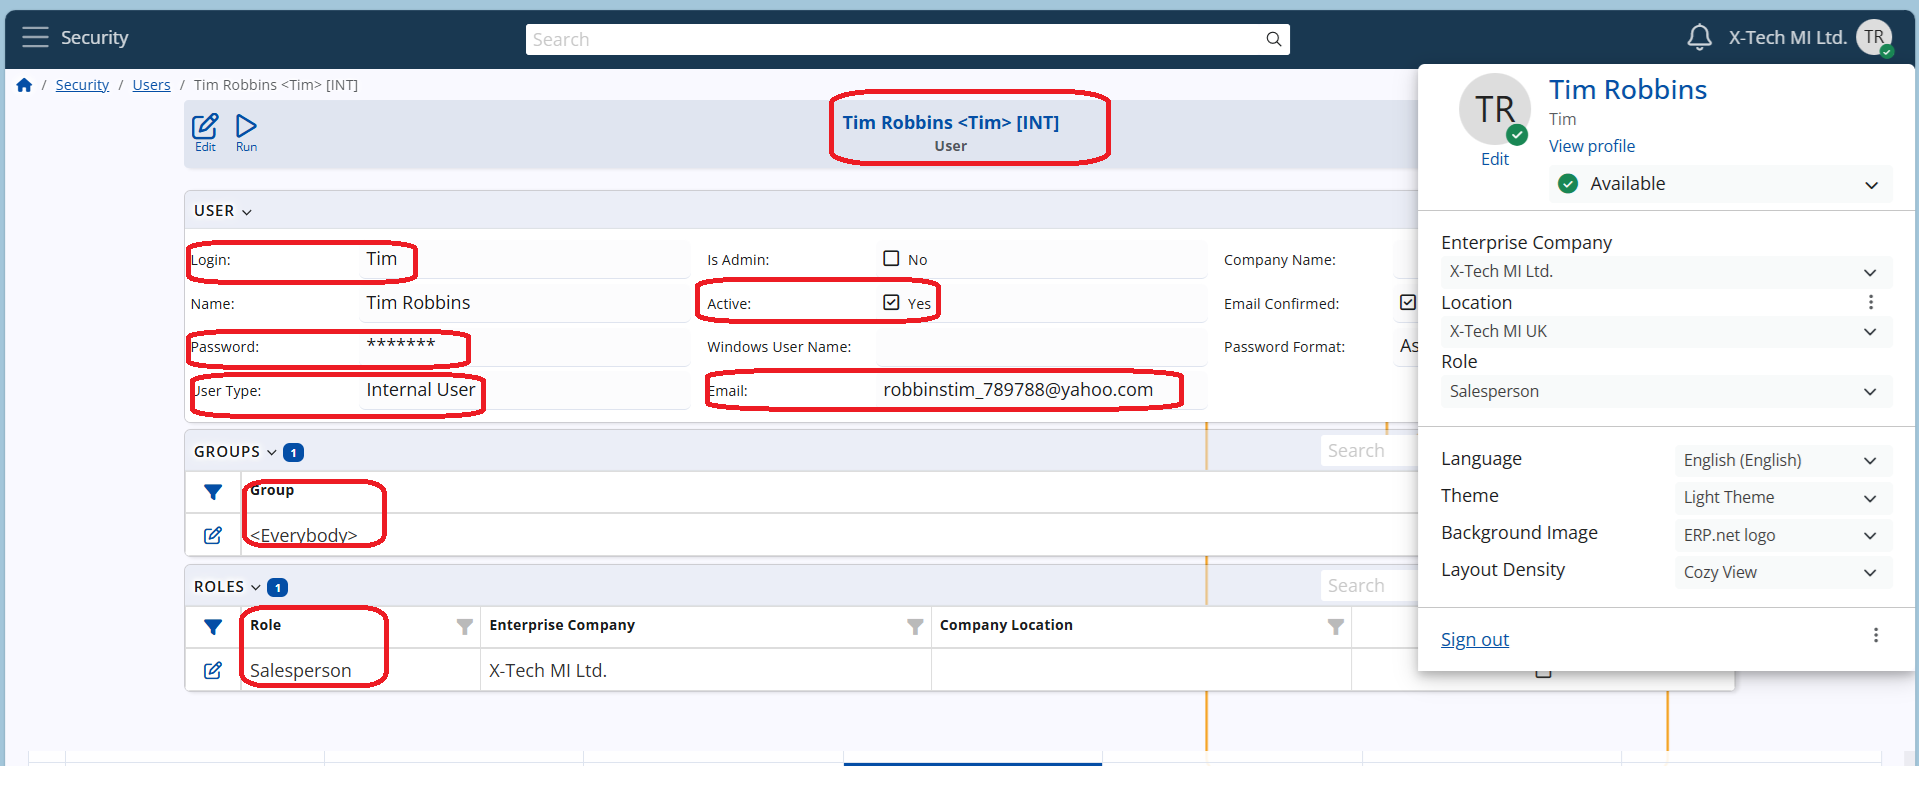
10. The user can now log into the instance using the given login and the newly set password.
11. The User Type will automatically change to "Internal".
12. The User will aitomatically be assigned to System group "Everybody".
The final result looks like this:
Note
If a role has not been assigned, after login the user might encounter this error:
"The currently logged user {UserName} has no assigned roles. Please contact your system administrator to configure the roles for user {UserName}.
In this case, the user should contact the administrator for assistance.