Setup AI
Before anyone can chat with AI or use it in business rules, an administrator needs to do a one-time setup. Think of this as the AI onboarding checklist for your ERP.net environment:
Configure an AI Server site
Connect a Provider (OpenAI)
Add your AI provider using an active OpenAI account and API key.
Note
All API usage is billed directly by OpenAI under your account, so you stay in full control of AI costs.
Create a Model (your AI assistant)
Define one or more models that represent the AI assistants you’ll use
(for example, Project AI, Sales AI, or a generic Master AI).Compile the Model (optional) If you plan to use a fine-tuned model as a chat Arbiter or for the AI Assistant feature, run a compilation so the model can use your training data and additional instructions.
Assign a Model to Users (optional)
If you want users to be able to chat with their AI assistant, assign a default model to them.
Once this setup is done, end users can seamlessly work with:
- AI Assistants in chat
- Chat Arbiters in group conversations
- Business rules powered by AI
- Ingest for feeding data into AI
…all without needing to know anything about API keys, providers, or models.
1. AI Server Site
The AI Server site is a small, one-time configuration that prepares your ERP instance for the newer AI architecture.
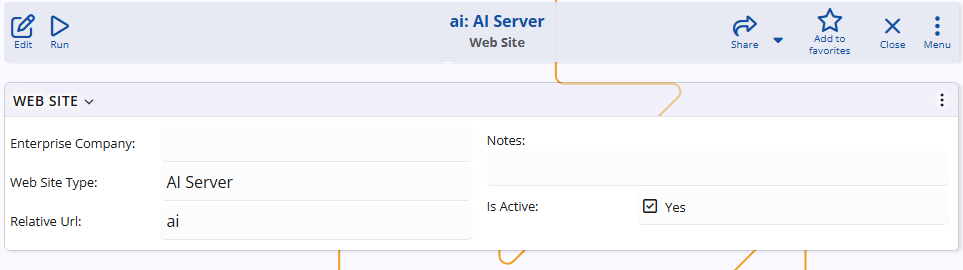
Creating the AI Server Site
- Open the Web Sites navigator.
- Click New to create a new web site record.
- Set Type to
AI Server. - The Relative URL will be filled automatically based on the default name.
- Click Save.
This is usually all that is needed.
Once saved, the ERP instance is considered “AI-ready” from an infrastructure standpoint.
Note
Make sure your license includes at least one site — the AI Server site uses the standard site licensing.
2. Provider (OpenAI)
After the AI Server site is configured, the next step is to define at least one AI Provider.
A provider represents an external AI service – currently, OpenAI. .
In this step, you will:
- Create (or log into) your OpenAI account.
- Configure API access and generate an API key.
- Create a Provider record in ERP.net and paste the key.
2.1 Create an OpenAI account
- Open the OpenAI platform: https://platform.openai.com/
- Click Sign up (or Log in if you already have an account).
- Complete the registration steps (email, password, verification).
Recommendation
For production use, create the account with a company email so that billing and access stay under organizational control.
2.2 Configure API access and create an API key
To allow ERP.net to call OpenAI, you need an API key.
- While logged into https://platform.openai.com/, go to API keys.
- Click Create new secret key.
- Enter a descriptive name, for example:
ERP.net Production. - Click Create and copy the generated key.
Keep it secure
- Treat the API key like a password.
- Store it in a secure place (password manager, secret vault, etc.).
- If the key is exposed, revoke it in the OpenAI portal and create a new one.
2.3 Define the Provider in ERP.net
Next, create the Provider record that will store the connection to OpenAI.
- In ERP.net, open [Module > AI > Providers].
- Click New.
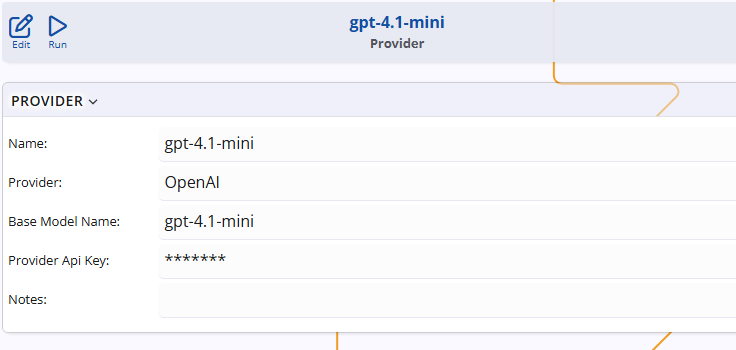
- Fill in the fields:
- Name – A clear name, for example
OpenAI Main. - Provider – Select OpenAI.
- Base Model Name – the base OpenAI model that this Provider should use (for example,
gpt-4oorgpt-4o-mini). If you’re not sure which OpenAI model to pick, see the next section for guidance on how to choose the right base model for your scenario. - API Key – Paste the secret key you created in step 2.2.
- Name – A clear name, for example
- Save the Provider.
Tip
Use descriptive names likeTest – gpt-4o-miniandProduction – gpt-4oso it’s immediately clear which model and environment each Provider uses.
Choose a base model and provider strategy
Each OpenAI Provider in ERP.net has a Base Model Name field.
This field defines which OpenAI model will be used when calling this Provider.
Typical choices include, for example:
gpt-4o-mini– cost-effective, suitable for high-volume or simpler scenarios.gpt-4o– higher quality at higher cost, suitable for complex conversations or critical business logic.
Each company typically defines at least one Provider pointing to its OpenAI account, but you may create multiple Providers when you want to:
- Use different OpenAI base models for different scenarios (for example, a cheaper model for everyday users and a more powerful model for management or critical processes).
- Separate test and production usage (for example, different models or different OpenAI projects/keys).
You don’t have to decide everything up front, but it helps to agree internally on:
- Which base model to use in production.
- Whether you want a separate Provider for testing vs. real work.
- Whether you need different Providers for different user groups, for example:
- a cheaper model for common users;
- a more powerful model for management or critical processes.
- A rough budget for monthly AI usage.
3. Model
An AI Model in ERP.net represents a concrete model configuration:
- which provider and base model it uses,
- what system instructions it follows,
- what training data it is connected to,
- and whether it is available in the assistant panel, in chats, for the additional AI functionalities, or in all of them.
You can define multiple models – for example:
- “Company Master Assistant”
- “AI Marketing Assistant”
- “AI Sales Assistant”
- “AI Developer Helper”
- or simply “AI Assistant”
Creating the Model (more info about each setting)
- Open the Model navigator.
- Click New to create a new model record.
- Fill in the following fields:
Name
Human-readable model name, e.g.,AI Marketing Assistant.Provider
Links the model to one of the configured AI Providers, and therefore to a specific base model and billing account.- Default model
Marks this model as the system default.
System-level AI actions (e.g., business rules, Ingest) use the default model when no user-specific model is assigned.
Only one model can be the default at a time.
- Default model
Build assistant
Controls how this model is used:Yes/ checked → the model is used as an assistant in the AI Assistant app and assistant panels in forms.
In this mode, it does not use Q&A / training conversations for fine-tuning.No/ not checked → the model can be fine-tuned with:- Q&A records, and
- Training Conversations.
These models are typically used as chat arbiters in channels or as specialized assistants.
Virtual User (optional)
A Virtual User whose identity the model uses in chats and in the assistant panel.
This is the “user” you see in group chats when the AI responds.This field is required only if the model will be used in conversations (AI Assistant or chat arbiter).
If the model is used solely for background operations such as Ingest, this setting is not required.Each virtual user can be linked to only one AI model (no duplicates are allowed).
If you need a new one, you can create it:- from Navigator → Users, or
- directly from the Virtual User field via right-click → Create new (If the menu is not visible, click Edit on the model first.)
When creating the user, the only mandatory setting is:
- User Type =
Virtual User (No login)
Parent (optional)
Used to build a hierarchical structure of models.
A parent model can aggregate training from its children, which is useful for a “master” company-wide assistant. red.System message (optional)
Global instructions that always apply to the model, such as:- tone of voice (formal/informal),
- language preferences,
- how to address users,
- specific company naming conventions, etc.
Keep this short and focused – typically up to 5-6 sentences of text at most.
Conversation compilation
Reference to the latest successful compilation that the model uses at runtime.
This field is maintained automatically after each compile.
4. Model Compilation
Once a model is configured, it can be compiled.
Compilation sends the model’s configuration and training data to the AI provider and creates a runnable assistant configuration there.
Compilation is required in only two cases:
- when you want to use a fine-tuned model as an Arbiter (with Q&A and/or Training Conversations), or
- when you want to use a dedicated AI Assistant (the My Assistant app or assistant panel).
In all other scenarios, ERP.net works directly with the base model defined in the AI Provider and does not require compilation.
Running a compilation
Here is some info on how to initiate a compilation and how to read its results.
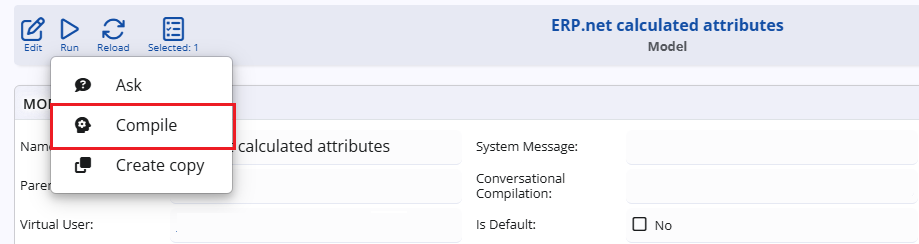
- Open the model definition.
- Use Run → Compile.
- Wait for the compilation to complete.
Once the compilation is started, you should simply wait for its result.
Compilation time can vary:
- Simple assistant models: usually a few minutes.
- Models with many Q&A and Training Conversations: can take longer, depending on the volume of training data.
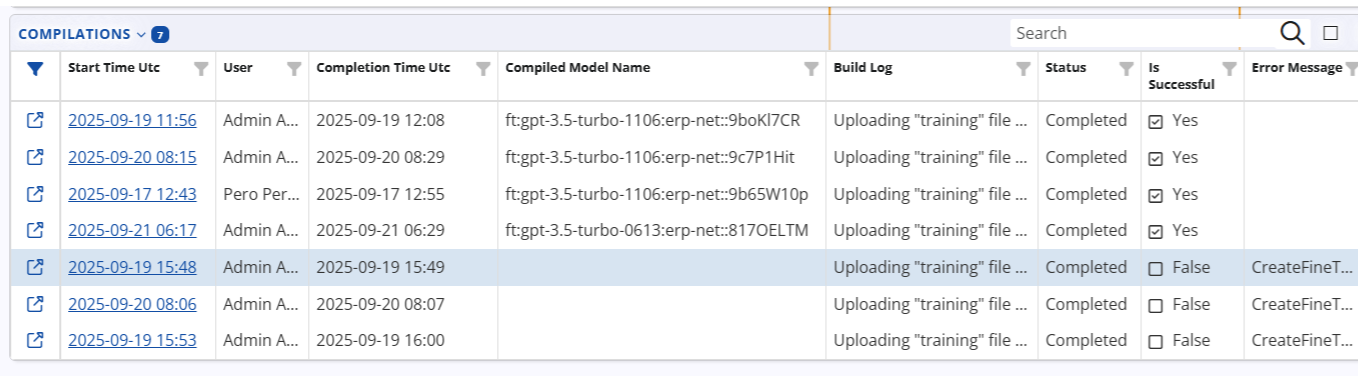
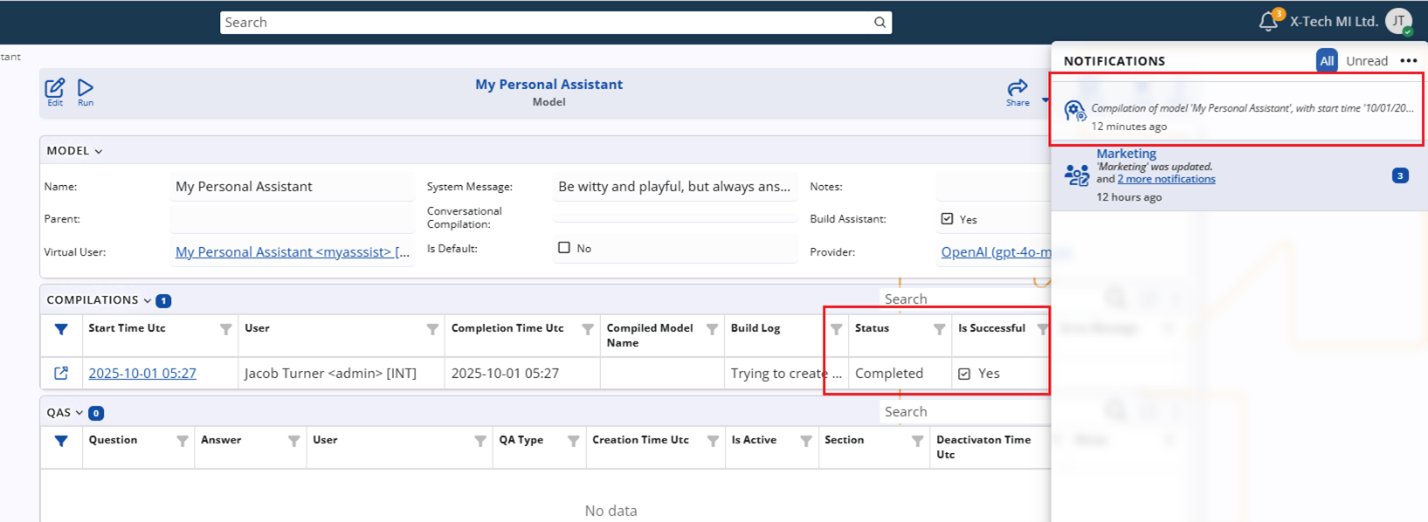
The result of each compilation is stored in the Compilations sub-panel of the model:
- Each row shows the Start Time Utc, Completion Time Utc, Status, Is Successful, and other fields.
- The Status field shows the current state (for example:
Queued,Running,Completed). - The Is Successful flag (
Yes/No) clearly indicates whether the compilation has finished successfully.
To monitor the Status, you can regularly check the Compilations sub-panel described above or simply wait for the system notification. When a compilation finishes, the user who started it receives a message in the Notifications icon (for example: “Compilation of model ‘My Personal Assistant’ completed”), which is the quickest way to see that the process has ended.
If the compilation is successful, you can continue using the model as configured.
If the compilation fails:
- Review the Error Message for the main cause (for example, an invalid or unsupported base model).
- If necessary, open the Build Log to investigate further details.
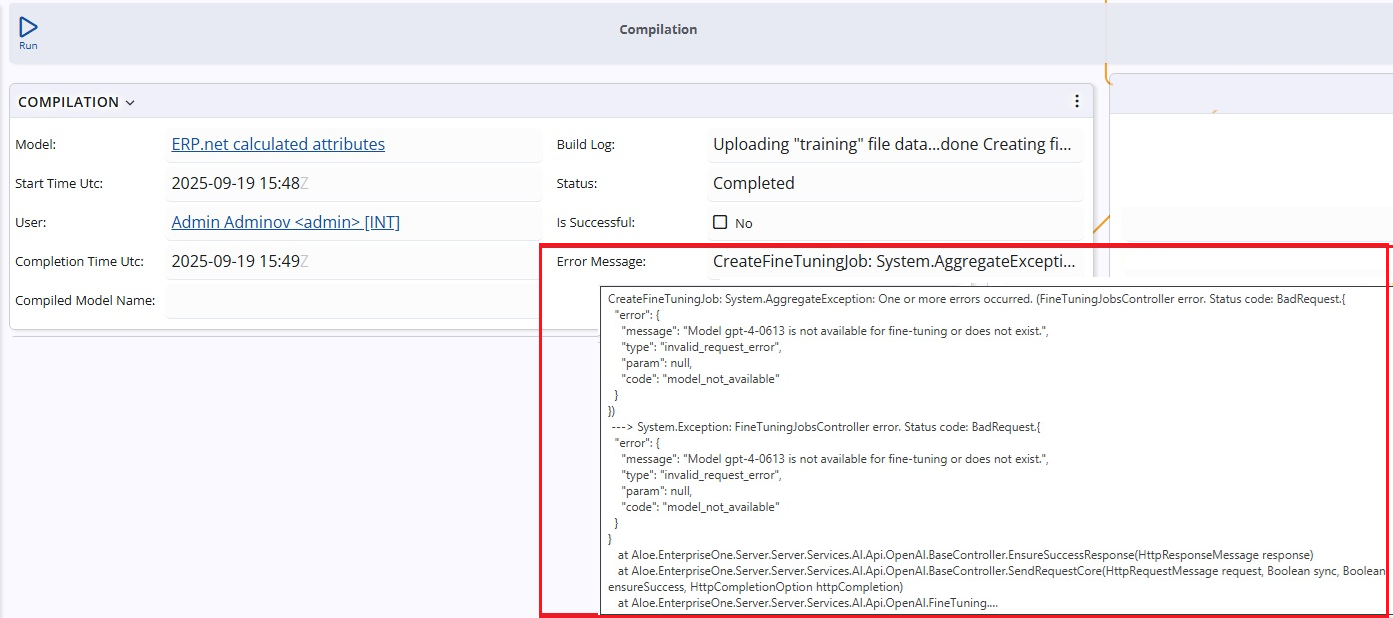
After fixing the configuration, you can run the compilation again.
Existing, previously successful compilations remain active and are used by the system until a new compilation completes successfully.
5. Assigning a model to users
This step is required only if you plan to use the AI Assistant functionality (the My Assistant app and assistant panels in forms).
User configuration
- Open Users.
- Open the user’s record (e.g.,
Admin). - In the Model field, select the desired AI Model.
This model will be used:
- in the AI Assistant app,
- and in assistant panels inside forms.
All AI Assistant conversations are user-specific and protected by the ERP.net security system.
One user cannot see another user’s assistant conversations.